Posts

Shapeways Ring

Image
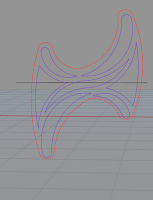
When I learned I was going to be designing a ring that I was going to be able to print I was beyond ecstatic. I wanted the architecture I chose as inspiration for the piece to have significance to me. The Dorton Arena was one of the first buildings to come to mind. With this in mind, I knew I wanted the design to cover the entire finger. I first drew the basic shape I wanted the ring to be. Then, knowing that I wanted there to be a lot of negative space, I drew the area that I wanted to be hollow. To turn the design into a surface I extruded all the shapes and to hollowed out the shapes by differencing it. To turn the flat shape rounded like the shape of a ring, I created a circle the size of my finger and used the flow along curve command. I felt very successful when I finished my ring. Not only was it a simple design, but I was able to exactly replicate what I taught out to make. The most exciting part, however, was receiving my ring in the mail and getting t

Chess Set

Image
Coming into designing the chess set I wasn't sure what I wanted to design. Instead, I used this assignment in a more experimental way. To create the base I started with two cylinders, one big, and one small, that I twisted to make an organic shape. Once I saw it gave me a vine like tree shape I decided to run with a floral design for my set. To create the leaf like shape at the bottom of the base, I traced and mirrored my desired shape. Then I extruded the curve to create the surface, and completed the leaf by bending it upward. To design the tops of my pieces, I started by designing an overall shape I wanted to work with (on the right). Then designed each piece individually with cones, cylinders, and spheres. My final pieces turned out better than I expected. I really enjoyed being able to show my creative style, and present something unique that was my design. King Knight Pawn Queen Rook Bishop

Reversed Engineered Project

Image
I won't lie the Reversed Engineered Project, for myself was probable the hardest. I began by measuring out every inch of my clock with the digital calibrator and writing down the measurements. Most of the clock was made by revolving the shapes I drew. For example, the basic shape of the outside rim of the clock, the bells, and many of the buttons were all revolved. The back is where most of the detail is found. To create the indents I made spheres and cylinders combining the shape, then differenced it to create the indentions. Creating the writing was also something new I learned, and I found it exciting to try to find the text match and extrude it on the surface. To design the battery pack I used a lot of rectangles and extrudes and differenced the shapes. I found the front of the clock to be less technical and more design oriented. I was able to play around with colors and gloss to create the shine of the metal, create the hour and minute ha

Toy Hammer

Image
Like the screwdriver, the easiest way to begin the hammer was by drawing rectangles to give myself an outline. Starting with the back of the head, we drew two circles, a big on centered at the neck, and a little one in the right corner. Then we used an arc to join the two circles at the top and bottom, trimming away the access. To complete the back of the head we extruded the surface straight. The last steps to complete the head consisted of drawing a curve and revolving it. Then to create the separation in the back we also drew a shape, extruded it, and differenced it. The final step was to fillet the edges to create the smooth edges. Creating the neck was probably the most challenging aspect for me. This step brought a new tool to the table and it wasn't working for me. The process began by drawing a box and two curves on both sides intersecting inside the head. Sweep 2 then turned the 2 dimensional shape into the neck. Finally caping the holes completed the nec

Screwdriver

Image
At first glance this project seemed very intimidating. However, I was in for a big surprise to see how simple it ended up being. To begin the best thing to do is draw a roughed out shaped that resemble the shape you are hoping to create. Once you have that shape you are able to draw your desired shape, being able to keep your proportions in order. The next step blew my mind. To create the shape to the right, all I had to do was revolve the line I had previously created. To create the pointed end a screwdriver has, we drew a line crossing the top and mirrored the effect to the other side. Then to complete the process we split the head and deleted the excess. The final step consisted of creating the grooves in the screwdriver. To do this, we drew a line in the desired shape, piped the line, and arrayed it around the screwdriver. Completing the grooves, consisted of differencing the pipes from the screwdriver. In the first screwdriver I made my tip ended up being too